Upon making the selection to install Servoy Developer, follow the installation wizard through the following steps:
- Specify the installation path. Servoy will choose a default application path appropriate to the system you are using.
Note: In Windows machines, the default path is the root folder rather than Program Files, to allow full write access to the installation folder.
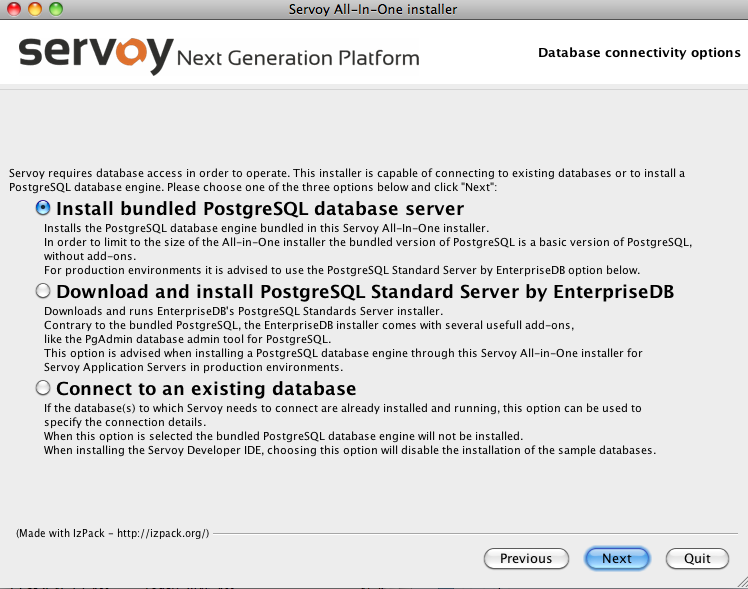
- Select your desired database options.
- The bundled PostgreSQL database is a basic installation of PostgreSQL without add-ons. This option provides a sample project database that is useful for those new to Servoy.
- The PostgreSQL Standard Server by EnterpriseDB option automatically downloads and installs a fuller-featured PostgreSQL database (including the PgAdmin database admin tool), and is an appropriate choice for those using Servoy Developer in a production environment. The sample database will not be installed by default when choosing this option.
Note: You will need to write down the database port and path locations during installation of PostgreSQL Standard Server for step 3 of this procedure.
- Connect to an existing database allows users to use databases that have already been installed and are running. If this option is chosen, the bundled PostgreSQL and sample databases will not be installed.
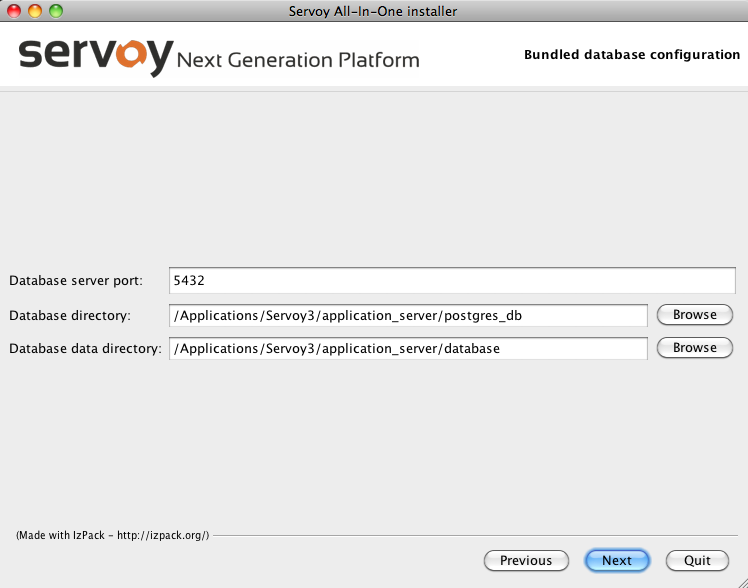
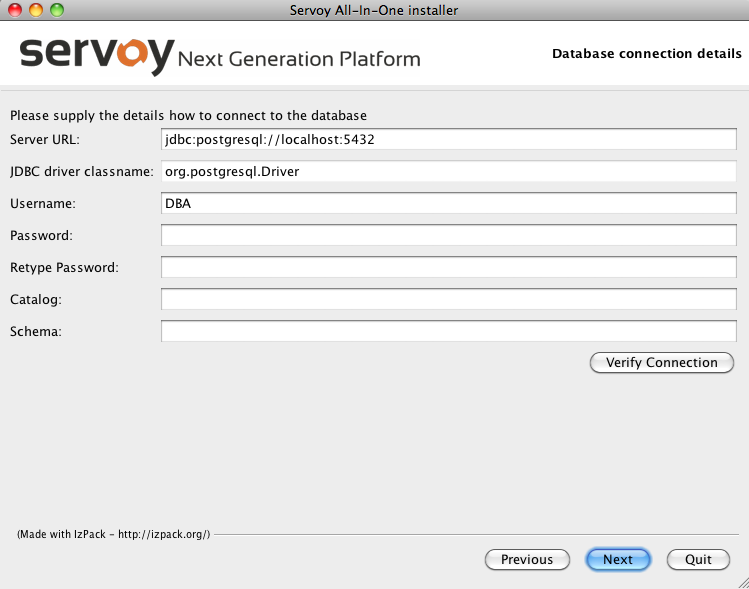
- Confirm or enter the database configuration or connection details as appropriate:
- Bundled Postgre installation – confirm or revise the information for Database server port, Database directory, and Database data directory.
- PostgreSQL Standard Server installation – Enter the information noted during the third-party installation.
- Existing database connection – Enter the database connection information (obtained from your database administrator) in this screen.
- Bundled Postgre installation – confirm or revise the information for Database server port, Database directory, and Database data directory.
- Select options to include with the installation. The nodes for Application Server and Developer, when expanded, show the full list of options along with the space requirements.:
- Clustering support gives the ability to cluster workspaces.
- Beans and plugins offer additional functions and pre-built code.
- Ready-to-use Skin Look and Feel files are also provided.
- PDF support package allows an application to output PDF files.
- Servoy Developer comes with sample solution files for beginning users.
Note: Options in gray are required for installation.
- Specify the your desired workspace location. This folder will contain your project files.
Note: After this step, Servoy will start installing the required files. This may take some time, particularly the last step (Processing files), during which the activity bar appears to pause. Be assured that the installation is still working in the background. After a few minutes, it will say "Finished" in the center of the progress bar.
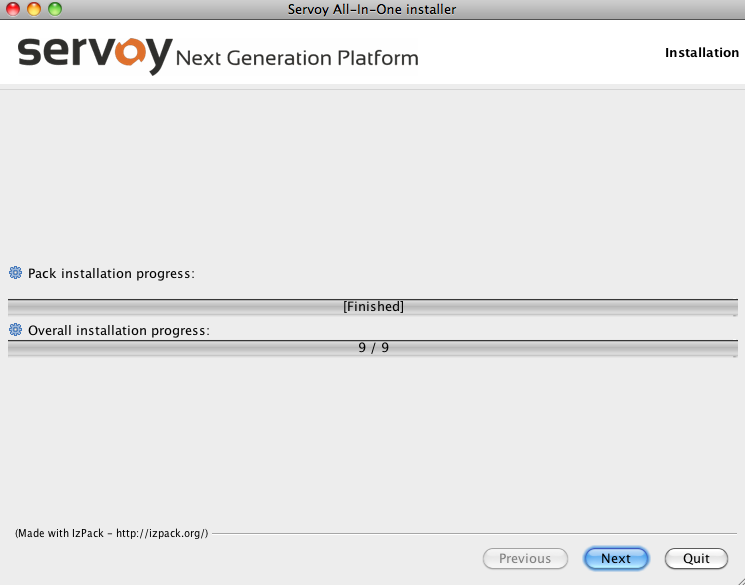
- Once the "Finished" message appears, click Next to continue. For Mac and Linux users, a message that says "Installation has completed successfully" will appear. For Windows users, an intermediate screen will appear before this message, which allows you to specify Start menu and desktop shortcut options.
Note: Hitting Quit at this stage installs the files but does not finalize. The files will have been installed and will be visible in the destination folder, but the installation will not work properly.
Note: At this point you can click the designated button to generate an installation script.
Overview
Content Tools
Activity