If you have connected to a repository, you are now able to share your solutions (which are Eclipse projects) with other developers by putting them in the repository.
You can also connect to the repository as part of the sharing process, but it is normally good practice to make sure that you can connect and that your repository is available before sharing it.
Share a Project from Your Workspace
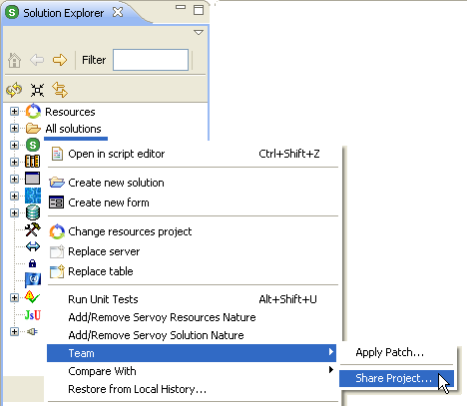
- In the Servoy Design Perspective, right-click your active solution node. From the contextual popup menu, select Team > Share Project...
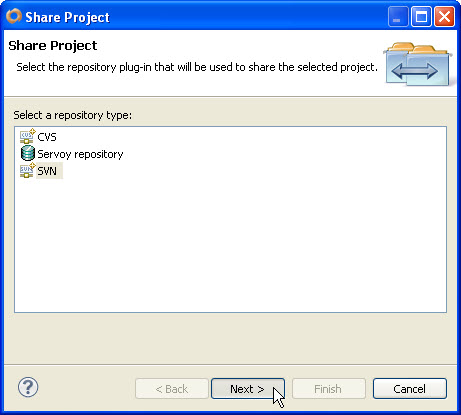
- Select SVN as the repository type and click Next
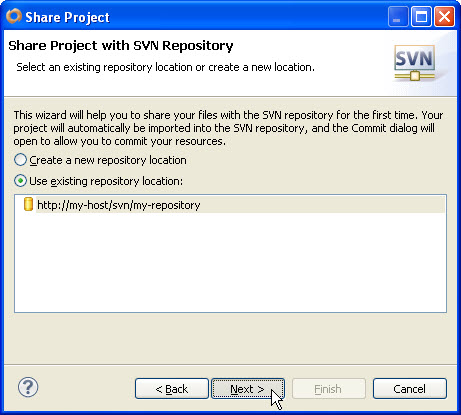
- Select an existing repository location (see Connecting to a SVN Repository) or create a new location.
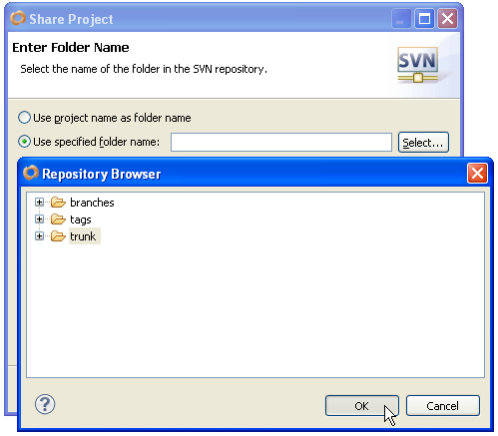
- Select the option to use a specified folder name and click Select. From the Repository Browser, select the Trunk folder. The trunk is normally where you want to store your solution.
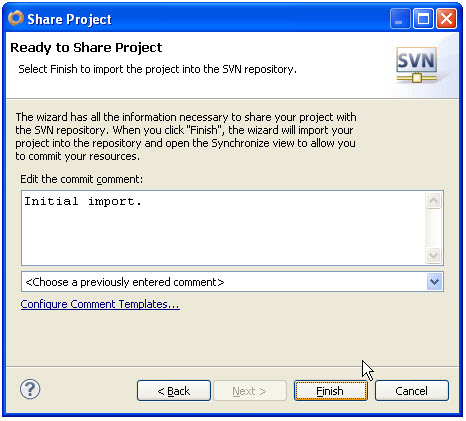
- Optionally enter a comment for the share. This action will commit the new project folder into the repository, but your other project resources are still not committed. This action also will count as a revision to the repository.
- If this is a fresh install of Servoy, then there is probably a repository database connection which is configured to serve as the default mode for team development. You will see a dialog, warning you that using different repository types at the same time can result in unwanted behavior. It is recommended to click the option to Change setting / restart and skip to step 8.
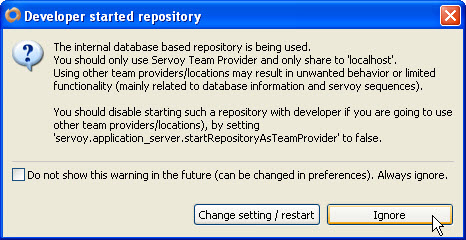
- If you chose not to change your settings as in step 6, and now want to change the setting, you can navigate in your Web Browser, to http://localhost:8080/servoy-admin and manually reset the property
startRepositoryAsTeamProviderto false. The next time Servoy Developer restarts, then the setting will take effect.

- Next you will be warned by another dialog that you will be navigating away from the Servoy Design perspective and into the Team Synchronizing perspective. This perspective is in fact not part of Servoy, but provided by the SVN plugin that you've installed. It is a good idea to go ahead and click Remember my decision before clicking Yes because you will be switching to this prospective quite a bit in a team development environment.

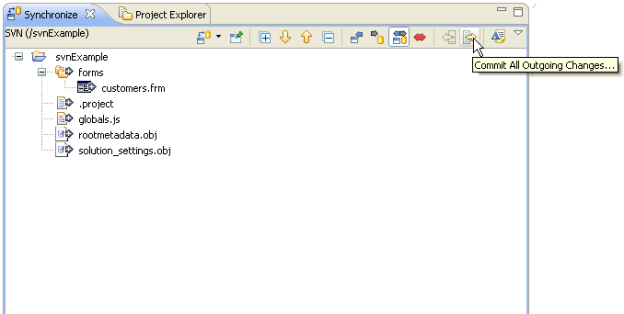
- In the Synchronize tab, you will see incoming and outgoing changes, as well as conflicts. Since we just shared the project, all of the resources in the project should show as outgoing changes. Select the button to Commit All Outgoing Changes...
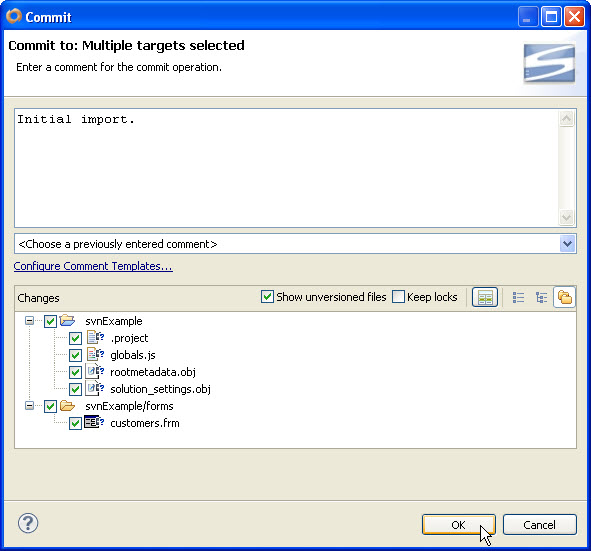
Once again, because you are committing a new revision, you'll have a chance to review the revision and you'll be prompted to add an optional comment.
Best practices dictate that you should enter a short comment for every revision to provide information on what was worked on. Many SVN tools use the revision comments to provide project visibility, such as email digests with revision summaries. Some tools even will integrate special notation in the comments to project management actions (i.e. ticket resolution).
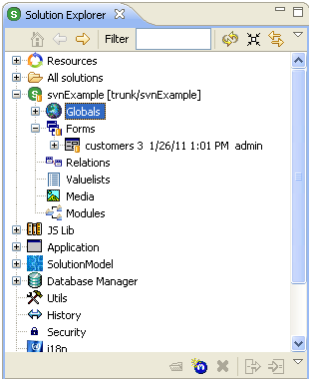
- Once complete, you may return to the Servoy Design perspective. And looking in the Solution Explorer tree, you'll find SVN metadata about each resource, including the current revision number, the date, time and user id for the last revision.
Repeat this process with the Resources Project. To do this right-click the Resources node in the solution explorer and follow the same steps as you did for the solution project.
Resource Project
The resource project is a separate project in Servoy Developer and must be uploaded to the repository separately. This project contains style, database, and i18n information and should be shared over all the developers.
What else can go into the truck folder?
Best practice would be to put any projects in the workspace into the trunk. This would be the main application project, any modules, and the resource project. If you are building multiple applications, you should consider using multiple workspaces, especially if the resources (database, styles, etc.) are different.
Overview
Content Tools
Activity