Page History
...
These instructions will concentrate on using the Windows installer. The other two options are available if a more customized installation is desired or necessary.
Once the installation file has been downloaded, executing the installer should open a window
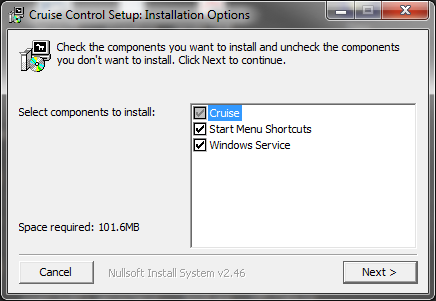
Select all the components. Next, the installer will ask for a location. This location should have sufficient rights for read/write
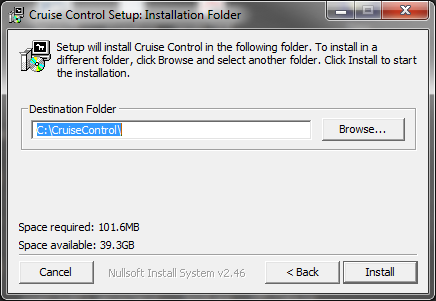
Clicking install will start the installation. After the installation is complete, there should be a folder containing the program contents
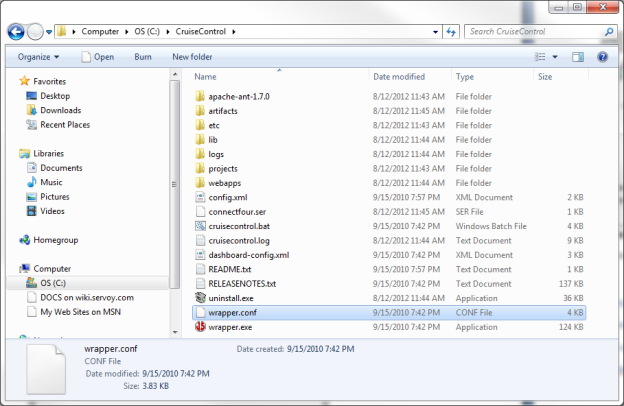
Also, if you open the Local Services control panel for the machine, there should be a service named "CruiseControl Service" available that has not been started yet. Go ahead and start the service to start CruiseControl.
CruiseControl ships with a default Java project named ConnectFour. When CruiseControl starts, it will try to build this project (using Ant) and return a result. To see if this has occurred, open the CruiseControl dashboard at the following location: http://<serveraddress_or_localhost>:8080/dashboard||||||||\. The application dashboard will launch and you should see a screen like below
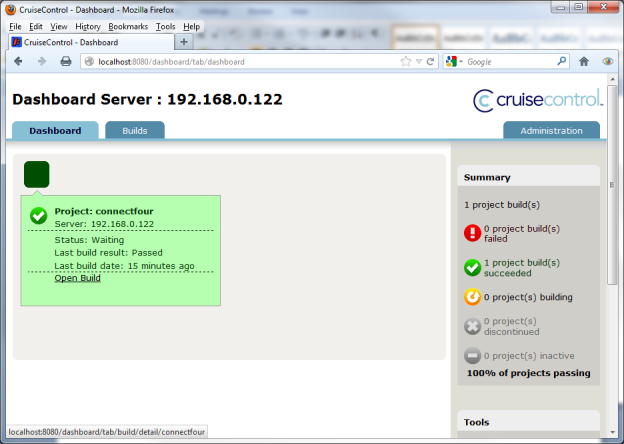
If the build has passed, then CruiseControl is configured and running properly in its default state.
Some troubleshooting tips if installation does not work:
...
Step 6 – Checkout Solution Into Work Area
At this time, it is a good idea to create the workArea file structure, create a folder name workArea and build the following structure (note that some of the files needed are provided later in this document) This is where most of the work will occur during the operation. CruiseControl will be configured to run out of this folder.
- antscripts
- test_runner
- cc_build.xml
- export_and_test.xml
- export_and_test.properties
- servoy.properties
- test_runner
- artifacts
- checkout
- test_runner
- logs
- config.xml
- cruisecontrol.properties
- dashboard-config.xml
Using the command line client installed, check out the solution (or solutions) from the SVN into the workspace file located at c:/SoftwareFactory/workArea/checkout/testrunner. For details on how to do this, please refer to the SVN client you have chosen.
...
- Make sure the solution is in the SVN repository.
- Open Servoy Developer, verify Subclipse 1.8 is installed.
- Change workspace to c:/SoftwareFactory/workArea/checkout/testrunner.
- Checkout the solution(s) from SVN repository.
- Change the workspace back to c:/SoftwareFactory/DeveloperWorkspace
- Close Servoy Developer.
NOTE: If you are using a SSL repository, the SVN server certificate must be trusted. Otherwise, the software factory will fail.
Step 7 - Configuration
A file structure should be started in this
A few items need to be configured at this point.
cruisecontrol.properties – a few items in this file need to be configured for your environment
...
Overview
Content Tools
Activity