Page History
...
- A Servoy Developer installation, with the SQL Explorer plugin installed and updated with the latest Servoy Server libraries
- A separate Eclipse environment with the Eclipse plugin development tools installed
- Configuration of the Eclipse installation
Quick start for the impatient
- Install Servoy Developer 5.2
- Run Servoy Developer and install the SQL Explorer plugin and close Servoy Developer again
- Install an Eclipse distribution that contains the plugin development tools for Eclipse (PDE), for example Eclipse Classic
- Setup a String Substitution variable named "servoy_install" which points to the installation directory of the previously installed Servoy Developer
- Create a ClassPath variable named 'WEBSTART' that points to javaws.jar of the used JVM
- Checkout the open source Servoy projects from https://subversion.servoy.com/product/branches/v52x_branch/.
- Download the builds of the Servoy Server libraries from http://build.servoy.com/latest/servoy_v52x_branch/ who's name postfix matched the value of the releaseNumber variable in the ClientVersion class of the checked-out source code and place them in <servoy_install/developer/plugins>. Remove any other version of the same file if it exists.
- Setup a Target Platform by:
- Opening the correct .target file, located in the targets directory of the "com.servoy.eclipse.core" project:
- generic.target when running Eclipse and Servoy Developer both under either a 32 or 64 JVM OR
- the .target file that matches the platform and JVM on which Servoy Developer runs. In this scenario, also add the JVM that Servoy Developer uses as Execution environment to the Eclipse installation and mark it as default.
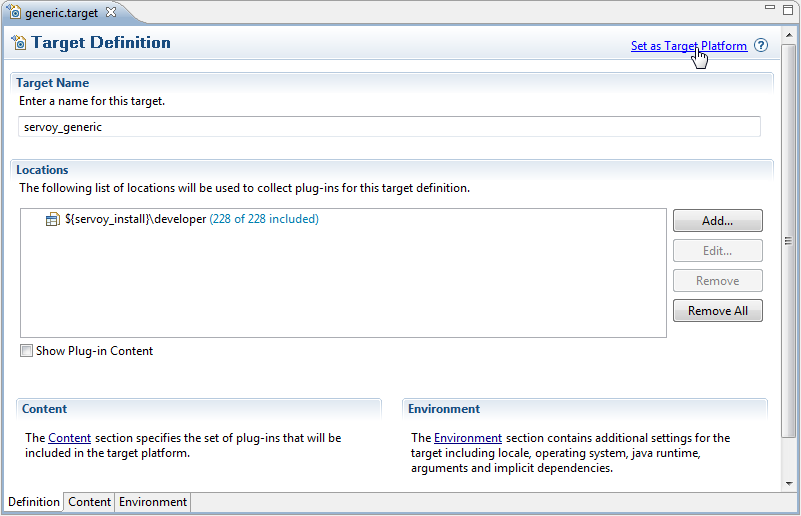
- Clicking the link "Set as Target Platform" of the Target editor
- Opening the correct .target file, located in the targets directory of the "com.servoy.eclipse.core" project:
- Create a Launch Configuration (and directly start a debug session) by right-clicking the "Servoy Launch.launch" file in the "target" directory of the "com.servoy.eclipse.core" project and selecting Debug as > Servoy Launch"
Before getting started: 32 or 64 bit installation
The easiest setup will be when both Servoy Developer and Eclipse operate under either 32 or 64 bit.
...
When mixing 32 and 64 bit, more configuration is required. This will be discussed under Configuration > Setup the Target Platform.
Installing Servoy Developer
The installer for Servoy Developer can be downloaded after login in at http://www.servoy.com/download.
...
After installation, start Servoy Developer and install the SQL Explorer plugin and close Servoy developer again. See SQL Explorer integration for more information.
Installing Eclipse with the Eclipse plugin development tools
The open source Servoy projects are all plugins for the Eclipse environment, so in order to develop on one of the projects a Eclipse version with Eclipse plugin development tools (PDE) installed is required.
...
One of the offered distributions that includes PDE is the Eclipse Classic distribution. Although the plugin development tools can be installed in any Eclipse environment, the easiest is to download the 'Eclipse Classic' distribution and install it.
Configuration
Start the downloaded and installed Eclipse installation and choose or create a workspace in which the development on the open source projects of Servoy will take place.
...
- Switch to the Java Perspective: Window > Open Perspective > Java
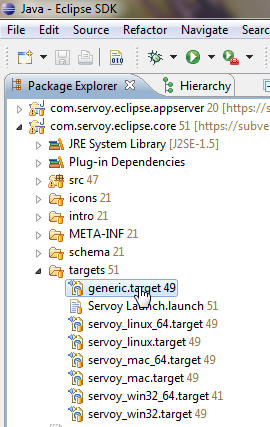
- Expand to com.servoy.eclipse.core > target in the Package Explorer
- Open (double-click) the correct .target file:
- when Eclipse and Servoy Developer both run on either a 32 or 64 bit JVM, open the generic.target file
- otherwise, open the file that matches the Servoy Developer environment
- Click the 'Set as Target Platform'. This will setup the Target Platform correctly, after which projects will be build and should compile without error.
- When using a mixed setup (generic.target is NOT used), the following additional steps are required:
- Add the JVM that is used by Servoy Developer to the Eclipse instance:
- Open window > Preferences > Java > Installed JREs and click "Add"
- Select "Standard VM" and click "Next"
- Select the directory of the JVM used by Servoy Developer as "JRE home" and click "Finish"
- Due to a bug in Eclipse: close the Preferences window
- Open Window > Preferences > Java > Installed JREs > Execution Environments
- Select the correct Execution Environment (the correct version of J2SE/JavaSE) and check the checkbox besides the name of the JRE under "Compatible JREs"that was added in the previous step
- Add the JVM that is used by Servoy Developer to the Eclipse instance:
Update Servoy Server libraries in the Servoy Developer installation: In order to also be able to start debug clients from Servoy Developer launched from the source code, it is required to use the correct version of several libraries of the Servoy Application Server.
Download the builds of the Servoy Server libraries from [http://build.servoy.com/latest/servoy_v52x_branch/|http://build.servoy.com/latest/servoy_v52x_branch/] who's name postfix matched the value of the releaseNumber variable in the ClientVersion class of the checked-out source code and place them in <servoy_install/developer/plugins>. Remove any other version of the same file if it exists.
Creating a Launch Configuration: Last step in the setup of the environment is the creation of a Launch Configuration. The checked out open source Servoy projects already contain a pre-configured Launch Configuration:
...
Overview
Content Tools
Activity