Page History
...
For a more indepth description of installing Servoy Developer, see Installing Servoy Developer|.....|||\
| Wiki Markup |
|---|
After installation, start Servoy Developer and install the SQL Explorer plugin. See \[\] for more information. |
...
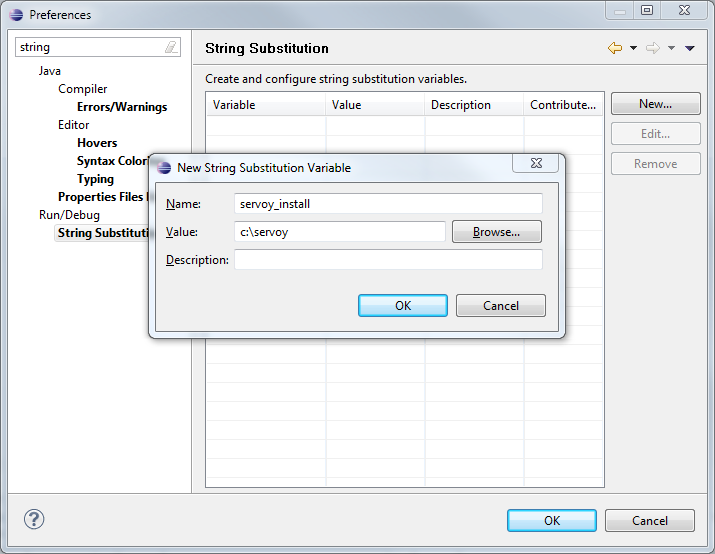
- Setup a variable: Go to Window > Preferences > Run/Debug > String Substitution and create a new variable named 'servoy_install' with the value of the directory where Servoy is installed.
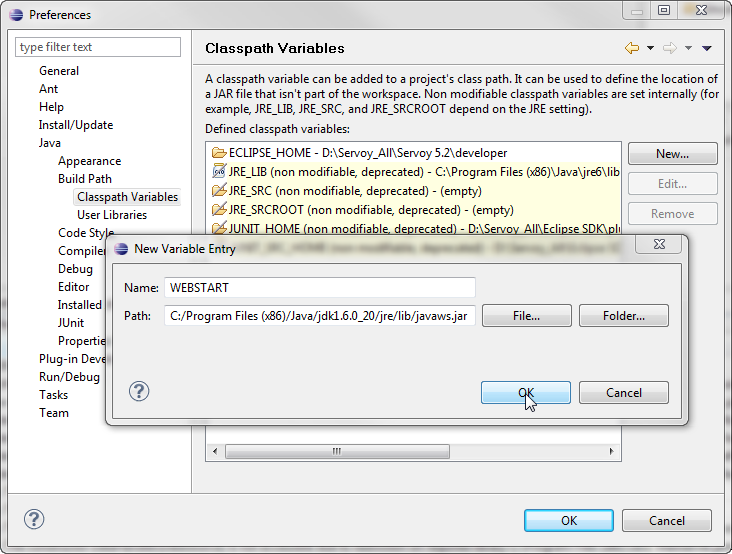
- Create a classpath variable: Go to Window > Preferences > Java > Build Path > Classpath Variables and create a new variable named 'WEBSTART' with the value of of javaws.jar in the Java installation.
- Setup a connection to the Servoy SVN:
- Open the SVN Perspective: Window > Open Perspective > Other > SVN Repository Exploring
- Add a new Repository Location: File > New > Repository Location
Installation & setup
- Download & install Servoy Developer.
- Download & install a version of Eclipse with Eclipse Plugin Development features installed (Eclipse SDK)
- Start Eclipse SDK and create a new Workspace
- Install an SVN plugin
- Checkout the Servoy Codebase from SVN
- Add a new target platform (Preferences > Plugin Development > Target platform > add).
- Add a Location under "Locations" of type "directory" and point it to the developer directory of the Servoy Developer installation
- Create a new Debug Launch configuration (Run > Debug Configurations)
- Select the "Eclipse Application" node and click the "New launch configuration" button
- On the "Main" tab:
- Provide a Name
- Specify a workspace location under "Workspace Data" by clicking "File System". Select the workspace containing your Servoy solution projects
- select 'com.servoy.eclipse.core.ide' under "Main" > "Program to run" > "Run a product"
- On the "Arguments" tab:
- Point "Working directory" > "Others:" to the developer directory of the existing Servoy installation, by clicking the "File system" button
- Apply the changes
...
Overview
Content Tools
Activity