
Overview
When using a local database instance for each developer, there is a need to make sure the database is up to date structurally. Most team providers will update the DBI files that store the database metadata, but these providers do not actually change the database. Changing the database is done in Servoy using Servoy's toolset. Servoy will modify the database, and also alert the developer if there is changes that require developer intervention. Changes are considered at the table level and at the column level.
DBI Files
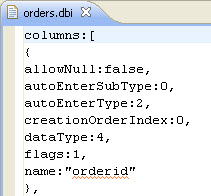
DBI Files are JSON files that contain meta data about the tables and columns in a database.
To view exactly what is in a DBI file:
- Open the Resource perspective.
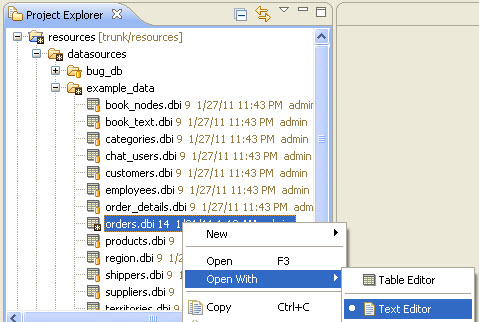
- Expand the Resource project and right-click the desired file. From the contextual popup, select Open With > Text Editor and view the resource as a JSON file.
Syncing DBI Files with the Local Database
There are a couple of Servoy Developer features used for changing the local database.
Synchronize With Database Wizard
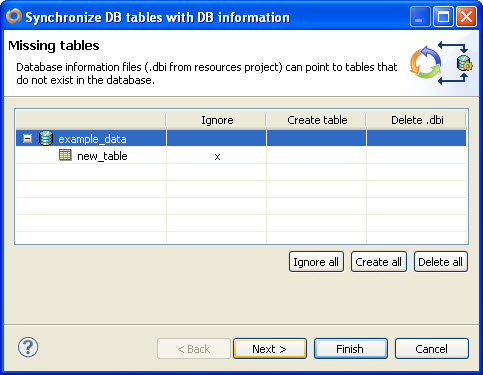
The synchronize with database wizard will allow creation and deletion of tables in database based on DBI file information. It will also create columns associated with these tables.
To launch the wizard:
- In the Solution Explorer, right click on one of the following:
- The resources project
- The database servers node under the resources project
- The desired database under the database servers node
- Select Synchronize with DB server information.
- A wizard will appear. Walk through the wizard to update the databases
Problems Tab Quick Fix
Unfortunately, the wizard will not fix any differences with existing tables in the database. Any differences between the DBI files and the local database will show up in the Problems tab, and these differences can be fixed using the Quick Fix menu option.
To use the Problems tab:
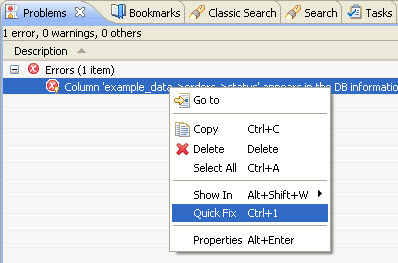
- Find the error in the Problems tab indicating that the DBI file is out of sync with the database. Right-click the error and from the contextual popup, select Quick Fix
- The quick fix dialog will appear. There are normally two options: to change the DBI file or to change the local database. Depending on which is correct, make the appropriate selection and click Finish.
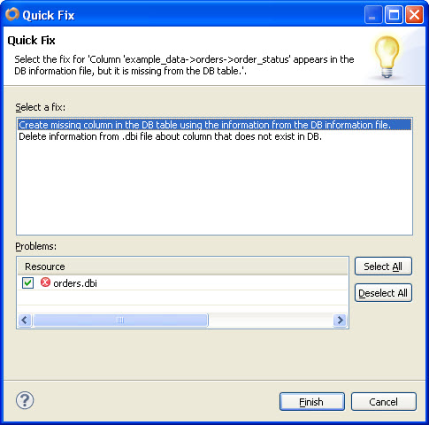
- Note that if there are similar errors, you may choose to do the same action across all error of the same type. This will be the default behavior, but if you want just one or a few, you may clear the checkboxes in the problems list before clicking Finish.
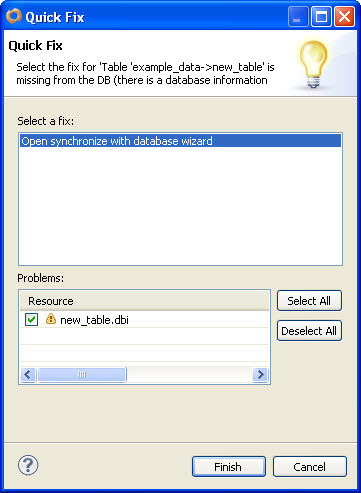
- In the problems list, if there are new tables that have not been synced yet, you may see a warning indicated the table does not exist in the database. You may use Quick Fix to open the synchronize with database wizard as well.
Some Notes about Team Development and Database Synchronization
- Database column changes will sometimes remove the data from the column (this is dependent on the platform and the type of change). This cannot be undone without a restore of the database from back up. Normally in development, there is little data in a database, but be careful.
- Do not simply walk through the synchronization and quick fix wizards. You must think about the choices you make when making selections. For the most part, the reason differences appear is because another developer has changed the database for some reason. It very easy to get into a 'loop' because one developer has added a database object and another one has destroyed it and changed the DBI file, then committed the change. Communication between developers is key when making database changes in the solution.


