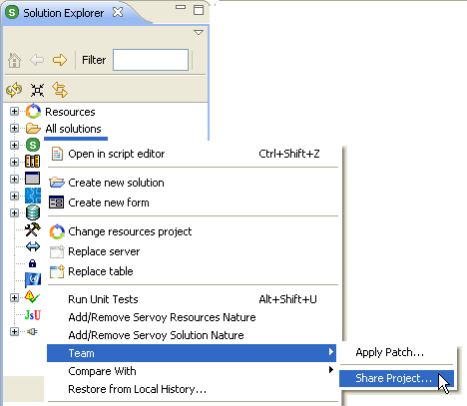
- In the Servoy Design Perspective, right-click your active solution node. From the contextual popup menu, select Team > Share Project...
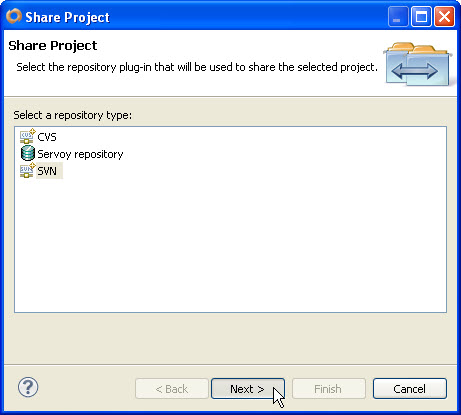
- Select SVN as the repository type and click Next
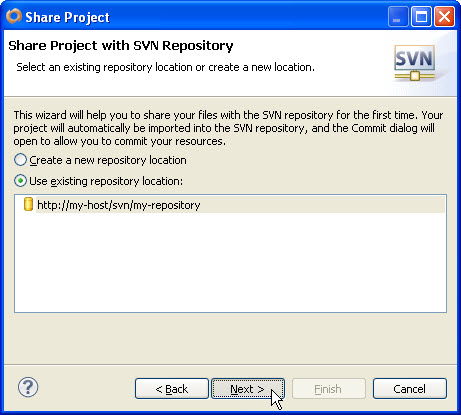
- Select an existing repository, the one to which you connected in the previous exercise.
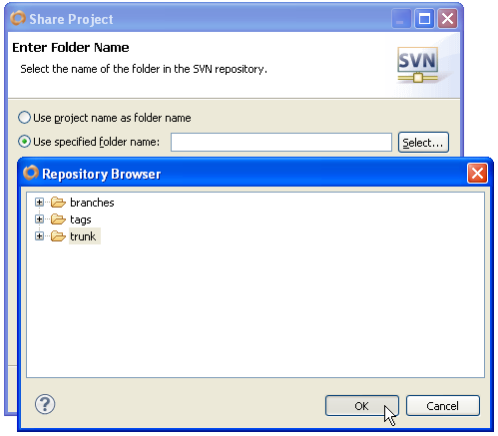
- Select the option to use a specified folder name and click Select. From the Repository Browser, select the Trunk folder. This is the folder where you will commit the project.
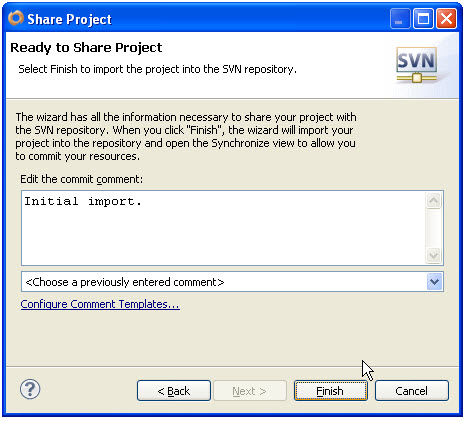
- Optionally enter a comment for the share. This action creates a new remote folder and therefore counts as a revision, which may be annotated. However the local resources haven't yet been committed.
- If this is a fresh install of Servoy, then there is probably a repository database connection which is configured to serve as the default mode for team development. You will see a dialog, warning you that using different repository types at the same time can result in unwanted behavior. You may either click the option to Change Setting / Restart. However, for this example, skip to the following step.
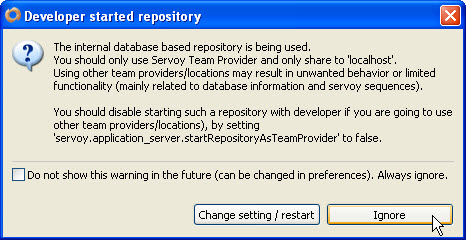
- Navigate in your Web Browser, to http://localhost:8080/servoy-admin and manually reset the property startRepositoryAsTeamProvider to false. The next time Servoy Developer restarts, then the setting will take effect.

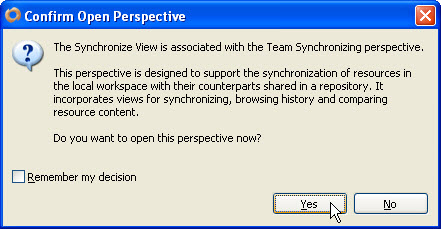
- Next you will be warned by another dialog that you will be navigating away from the Servoy Design perspective and into the Team Synchronizing perspective. This perspective is in fact not part of Servoy, but provided by the SVN plugin that you've installed. And you will spend a lot of time here during team development.
- In the Synchronize tab, you will see incoming and outgoing changes, as well as conflicts. Because we just shared the project, all of the resources in the project should show as outgoing changes. Select the button to Commit All Outgoing Changes...
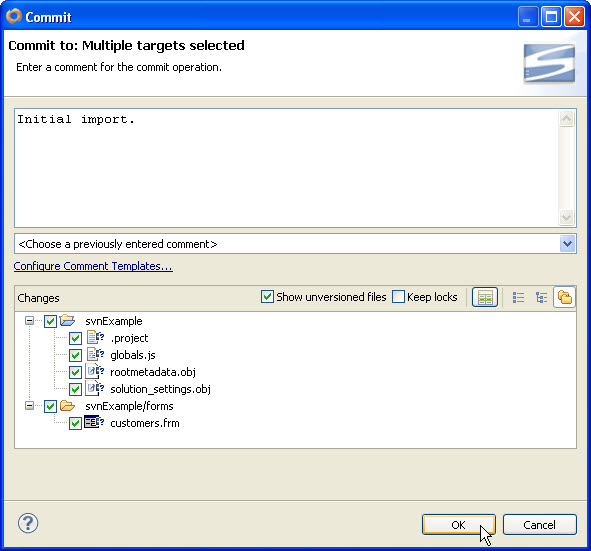
!worddav285f1a1fa5801f1969ba59935c4974ca.png|height=314,width=624! - Once again, because you are committing a new revision, you'll have a chance to review the revision and you'll be prompted to add an optional comment. Get in the habit of providing a short comment for every revision to provide information on what was worked on. Many SVN tools use the revision comments to provide project visibility, such as email digests with revision summaries.
- Once complete, you may return to the Servoy Design perspective. And looking in the Solution Explorer tree, you'll find SVN metadata about each resource, including the current revision number, the date, time and user id for the last revision.
!worddav97fed3ca77b4f3029eed76a45f6b26c7.png|height=379,width=309! - Repeat this process with the Resources Project. To do this right-click the Resources node in the solution explorer and follow the same steps as you did for the solution project.
Overview
Content Tools
Activity