The Servoy All-In-One installer is capable of installing both the Servoy Application Server and Servoy Developer
This chapter describes the process of installing the Servoy Application Server. For information on the installation of Servoy Developer, please refer to the Developer User Guide
The All-In-One installer requires the target environment to have a Graphical User Interface in order to run the installer. For environments without a GUI, see Performing an unattended installation
Choosing the correct installer
The Servoy All-In-One installer comes in 2 variations:
- The cross platform installer (.jar)
- The Windows executable installer (.exe)
The cross platform installer can also be used on the Windows platform, but some virus scanners block the execution of .jar files. Therefore, the Windows executable installer is provided as alternative
Running the installer
To start the installation, execute the installer. Depending on the platform, either double click the servoy_installer.jar or execute the following through the command line or terminal window:
java -jar servoy_installer.jar
When double clicking, the cross platform installer opens the servoy_installer.jar as an archive file instead of an executable, the extention '.jar' is not configured to be opened by Java. Either use the command line option, use the platform's "Open with" option or configure the platform to open '.jar' files using Java.
Stepping through the installer
Step 1 - Welcome page
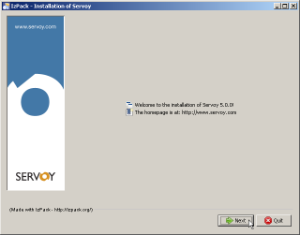
When the installer opens, the screenshot below will represent itself. Click "Next" to continue.
Step 3 - License Agreement
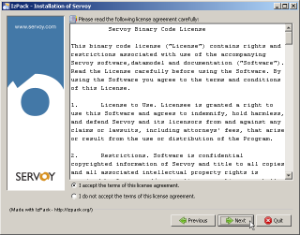
Accept the License agreement and click "Next" to continue.
Step 4 - Installation Location
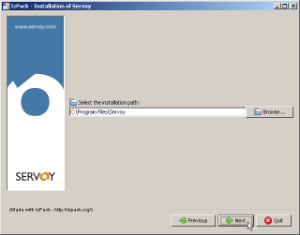
The following screen allows the installer to set the location where the Servoy Application Server will be installed. If required, provide a different location and click "Next" to continue.
The user under which the Servoy Application Server will run requires read/write access rights on the directory in which the Servoy application Server is installed.
Step 5 - Options

The following screen allows the specification of which optional packs to include in the installation.
For an Servoy Application Server only installation, uncheck the Developer and Example Files packs.
When the installation does not require PostgreSQL for either the Servoy Repository or solution data or when the PostgreSQL engine is already installed, uncheck the Database pack. Check the Installing on existing databases chapter for more information when unchecking this pack.
When the Servoy Application Server needs to run as a service under the operating system, check the 'Application Server Service' pack.
Clicking Next will start the installation of the Servoy Application Server.
Available Packs
| Pack | Mandatory | Contents |
|---|---|---|
| Application Server | Yes | Servoy Application Server |
| Developer | No | Servoy Developer |
| JDBC Driver Files | Yes | JDBC drivers shipped with Servoy by default |
| Database | No | PostgreSQL database engine as well as the sample databases shipped with Servoy |
| Runtime Builder | No | Servoy Developer plugin to create the Servoy Runtime Client |
| Application Server Service | No | Feature to install the Servoy Application Server as a Service |
| Example Files | No | Sample solutions |
| Headless Client Sample | No | Servoy Headless Client sample |
| Documentation Files | Yes | Servoy Client documentation |
| Beans | No | All default beans |
| Plugins | No | All default plugins |
| Look and Feel Files | No | Several Java Swing Look and Feel files for customizing the Servoy Smart Client appearance |
| PDF Support Package | No | PDF Output Plugin to support for working with PDFs to Servoy |
Step 6 - Installation Progress
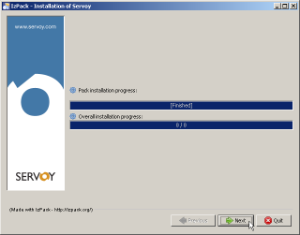
The following screen shows the installation progress. When finished, click 'Next' to continue.
Step 7 - Shortcuts
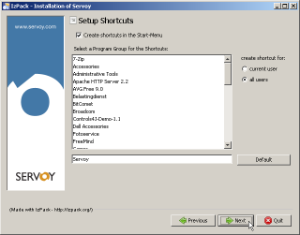
The following screen allows the creation of shortcuts in the Start Menu. This option is only available on Windows
Uncheck the "create shortcuts in the Start Menu" is not required and click 'Next'.
Step 8 - Installation Script
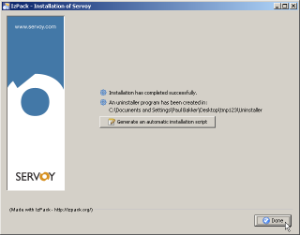
The last screen allows for the creation of an installer script for Performing an unattended installation.
The installation is now complete and, with default configuration, the Servoy Application Server is ready to use.
If the Database option was unchecked, check out Installing on existing databases.
Refer to the chapter Configuring the server to learn more about further configuration of the Servoy Application Server. For example, to run the Servoy Application Server on different ports than the default ports.
See chapter Operating the server for information to start the Servoy Application Server.
Overview
Content Tools
Activity