Users can create a solution using one of the following ways:
- Via the File Menu>New>Servoy Solution
- Using the New Wizard button on the Toolbar (the drop-down on the right allows users to select Servoy Solution; a click on the button itself brings up the New/Select a Wizard window from which Servoy Solution can be selected from the Servoy node.
- Using the keyboard shortcut ALT+SHIFT+N (cmd N) and selecting Servoy Solution from the New/Select a Wizard list.
- Accessing the context menu in Solution Explorer on either the All Solutions or the active solution node and selecting Create New Solution.
When you create a new solution, the following New Solution wizard appears.
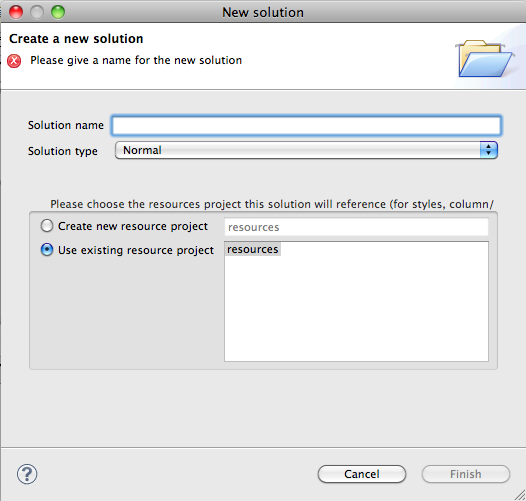
- Enter the name you wish to use for the new solution.
Solution names are case-sensitive.
- Select the solution type from the following options:
- Normal – a standard solution that can be deployed both to the web and as a smart client
- Module – a solution that will be used as part of another solution
- Web Client Only – a solution that will only be deployed as a web client
- Smart Client Only – a solution that will only be deployed as a smart client
- Login – a module solution that enables clients to login to a Servoy solution
- Authenticator – a module solution that authenticates users on the solution server.
- Pre-import hook module – a module solution that is used during application import.
- Post-import hook module – a module solution that deploys upon application import.
Note: When you create a new solution as a module, this module is added to the currently active solution.
Tip: The solution type can be changed after it is created via the Properties view. Under the Properties node, click on solutionType; a drop-down list will appear displaying the available solution types.
- Select the resource project.
- The resource project contains settings for database servers, styles, user and group security, i18n, and any available templates.
- You can select an existing resource project or create a new resource project.
- Click Finish.
- The new solution is activated in Solution Explorer.
Overview
Content Tools
Activity